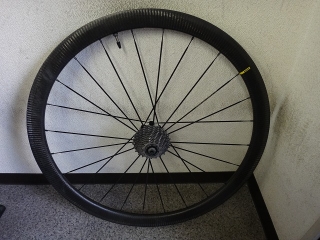
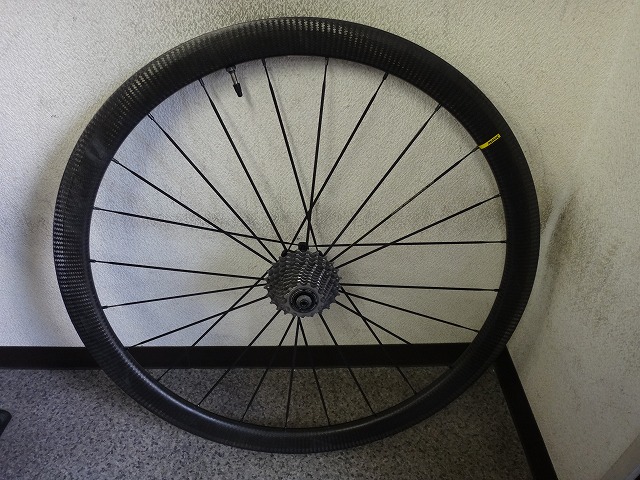
A customer left a Cosmic Carbon UST hub with us for service.
It was shipped from a distance, but beforehand
they consulted me about the symptoms:
the freebody wouldn't come out by hand, and
there was lateral play in the rear hub axle.
The Instant Drive 360 uses a press-fit end design
with no threaded bearing adjustment element to speak of,
so logically there shouldn't be any lateral play.
However, I actually know of cases where lateral play appears
when the snapring in the groove at the left end of the hub axle
comes loose for some reason.
Having known about this issue, I advised them: "Try checking the snapring"
but . . .
In the end, the wheel was shipped to our shop.
Both sides use press-fit ends.
The previous FTS-L freebody
has a rather unique structure where the bearing sits on the outside of the freebody
(meaning there's no bearing on the inside of the freebody itself),
with an inner diameter of 9mm.
To accommodate a 12mm through-axle,
the hub axle obviously needs an inner diameter of 12mm,
while the outer diameter needs to be 15mm or 17mm.
This also becomes the bearing inner diameter for the hub shell and freebody.
This hub can also be converted from quick-release to through-axle
by swapping the press-fit ends,
but since this is a rim brake wheel,
converting it to through-axle would probably never happen.
Beyond ease of through-axle conversion,
another characteristic of the Instant Drive 360
is its ratchet surface design, similar to DT's star ratchet.
However, the window for maintaining initial performance is extremely short,
and considering the price and availability of the proprietary paste grease,
plus the maintenance frequency needed to keep it in ideal condition,
proper operation of the system itself isn't realistic.
In fact, most wheels brought in here have ratchet grease that's completely dried out.
So if you ask me, it's a flawed design spec.

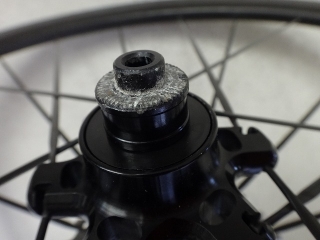
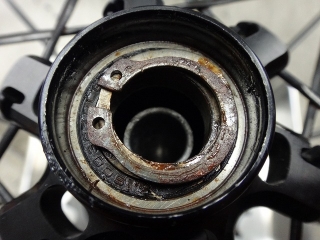
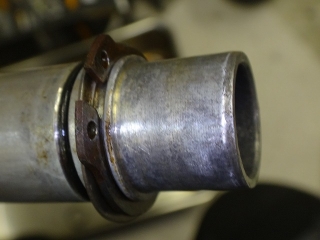
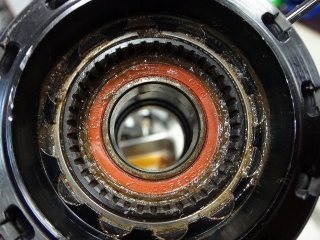
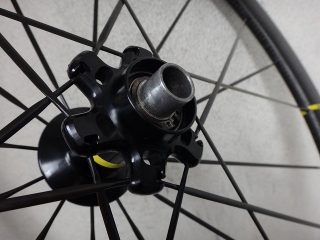
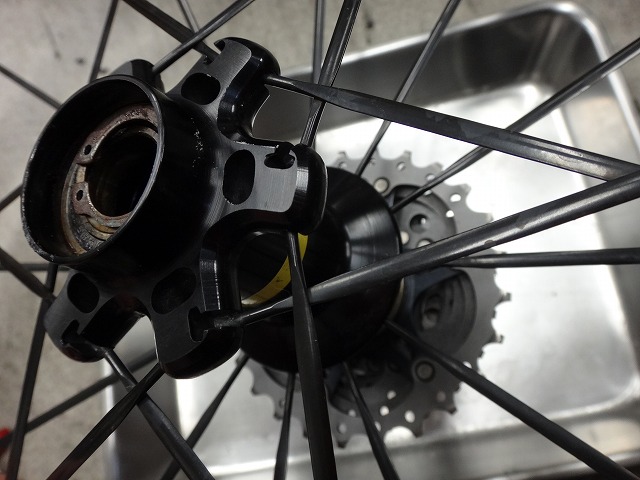
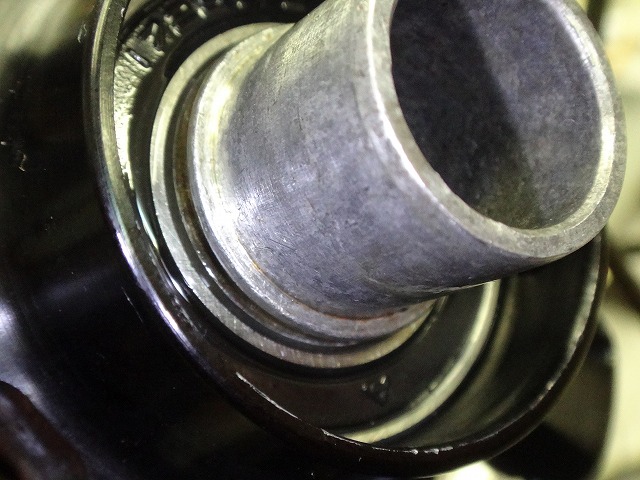
I removed the left press-fit end.
That's all I did—nothing else.
I took shots from different angles too, afraid of missing anything in the photos.
The customer's letter said "The snapring area seems to be assembled correctly,"
but sure enough, that's where the problem was—it wasn't assembled correctly.
It stings a bit when I've identified both the problem and the solution
but the message doesn't get through.
This isn't the first time, won't be the last,
and honestly, it happens pretty often.

Confident the snapring wasn't seated properly,
I gave it a gentle tap with a plastic hammer,
and the freebody-equipped hub axle popped right out the right side.
↑Like this
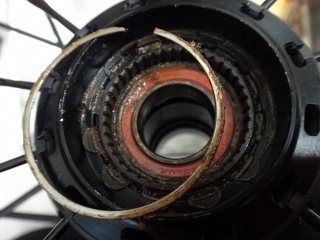
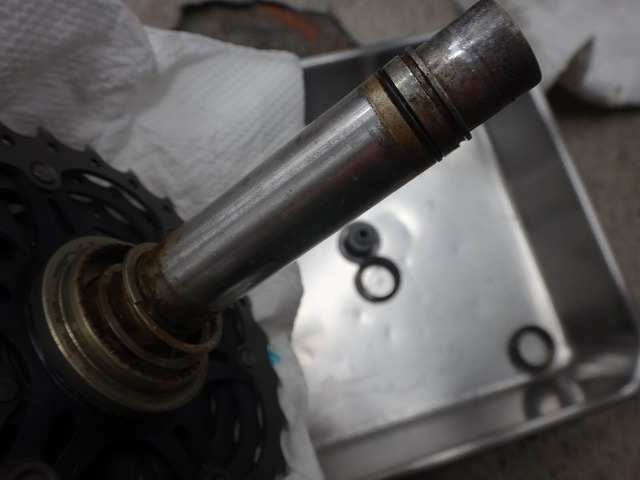
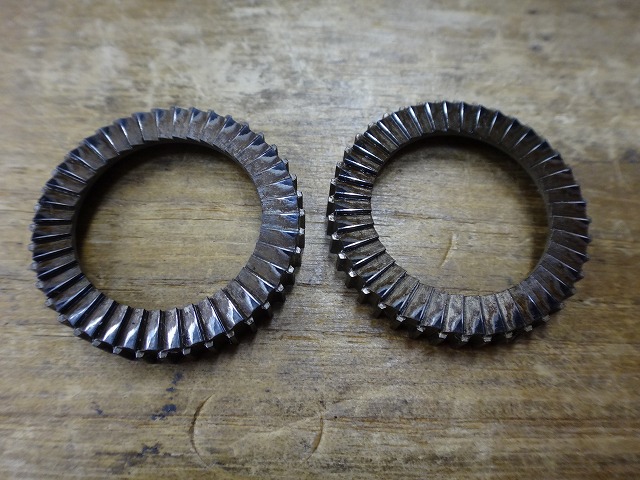
A wave washer is sandwiched between the snapring and bearing,
and the tension from this washer definitely makes it difficult
to seat the snapring into the groove.

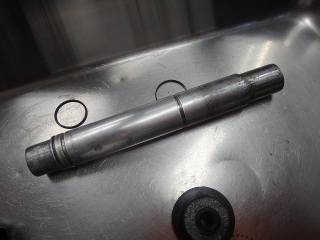
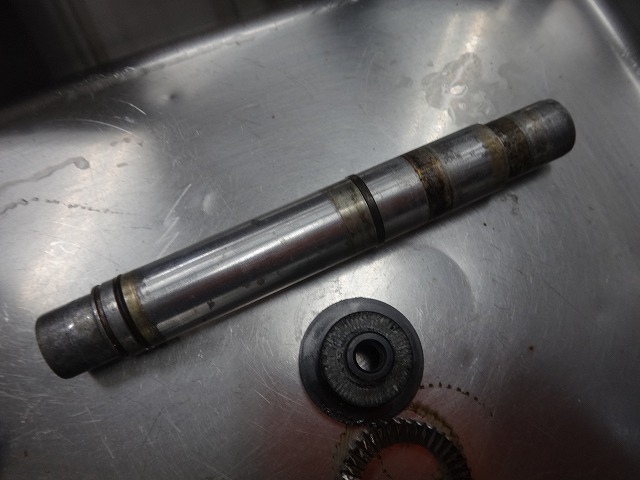
↑The removed assembly
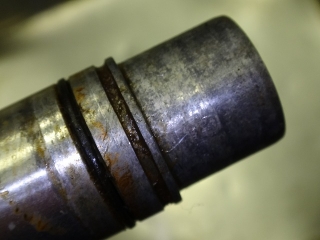
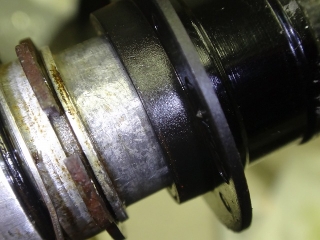
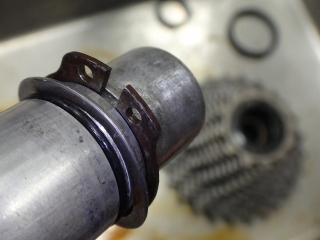
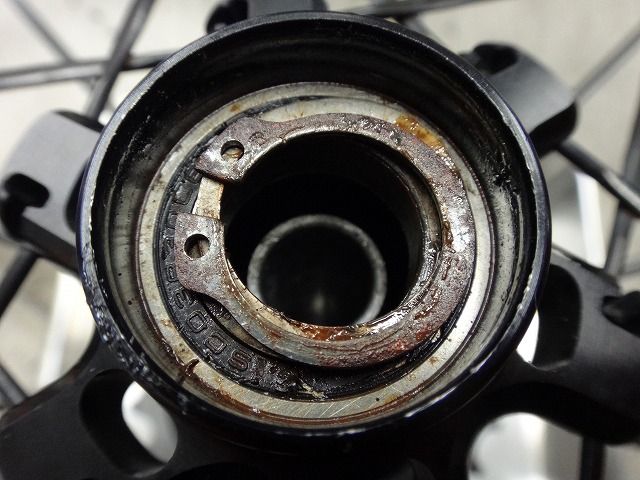
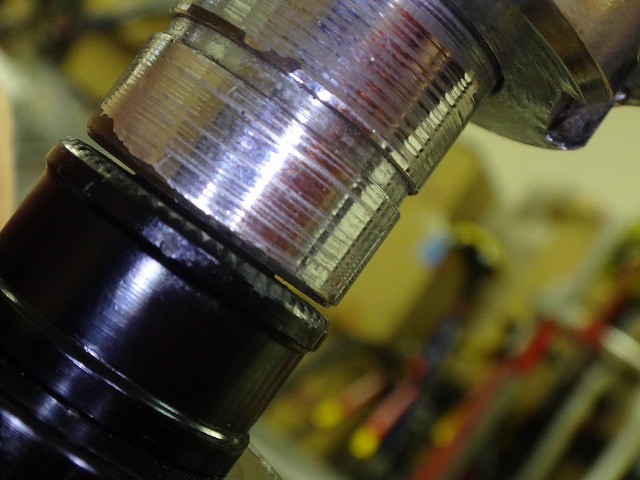
There are two grooves on the left side of the hub axle:
the inner one holds an O-ring directly beneath the bearing,
and the outer one is the groove for the snapring in question.

Because the freebody wouldn't come out by hand,
I happened to have a DT puller tool that fit perfectly,
so I attached it,
and pulled it out.
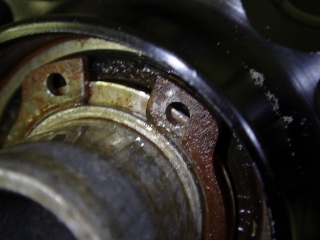
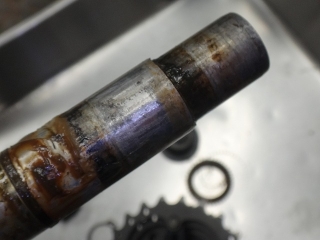
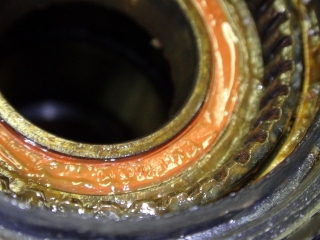
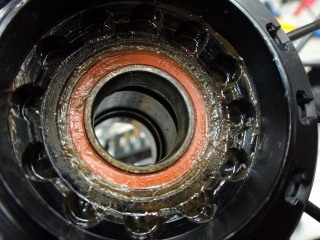
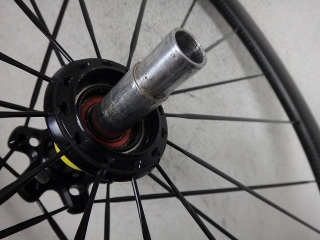
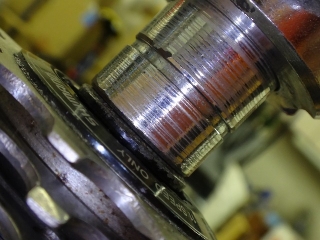
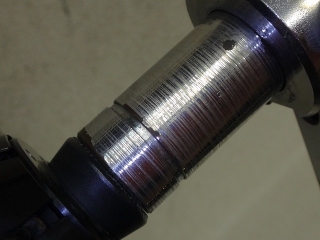
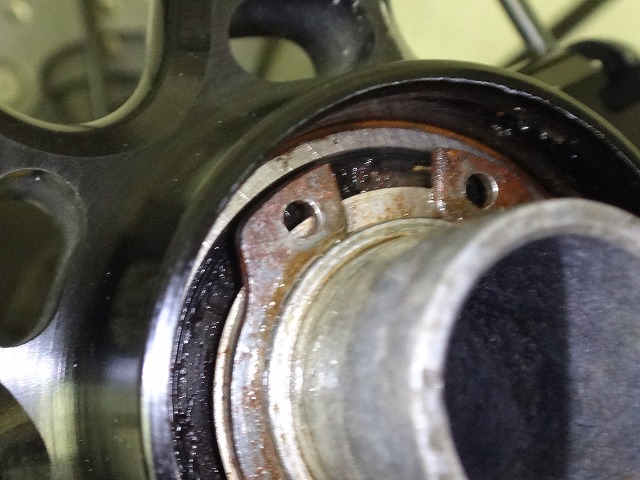
There's some flash rust on the section directly below the bearing,
but since the customer had the freebody replaced recently at a nearby shop,
the bearing itself shows minimal wear.
Still, when the hub axle is this rusty and dirty,
it can get nearly stuck even with undamaged bearings.
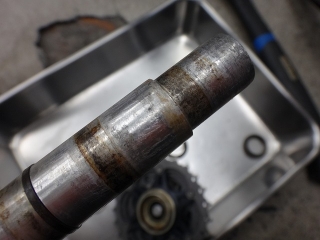
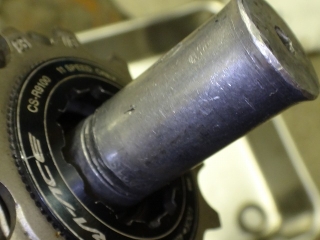
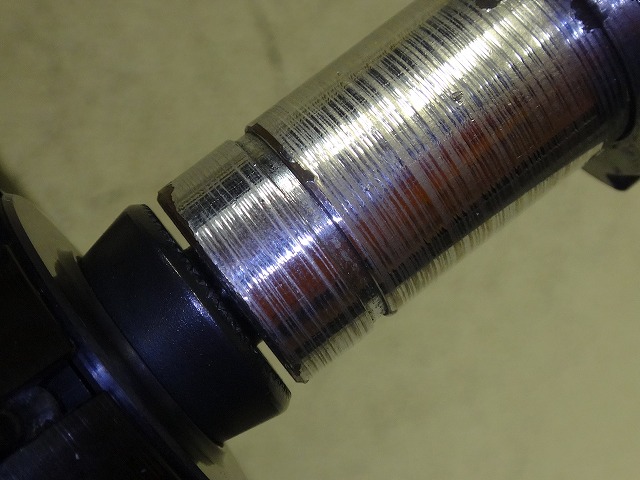
I wiped away the dirty grease.

Before
After
The C-ring on the right side of the hub axle that holds the right bearing of the hub shell,

and the rubber O-ring on the left side of the hub axle—
I temporarily removed both and polished them as much as possible.
The hub's interior was so heavily rusted
that I asked the customer later if they'd been using a pressure washer,
but they said they hadn't. Hmm.
The interior of the hub shell is heavily rusted too.
Despite appearances, I thought the right bearing of the hub shell
showed minimal enough wear to not need replacement.
At that point in time, anyway.
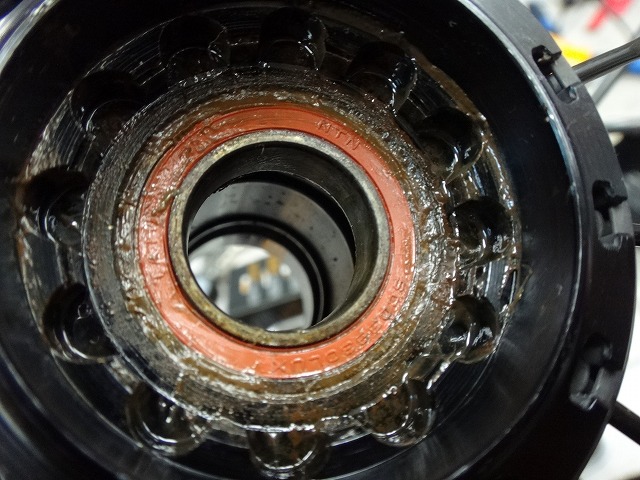
Looking at the bearing seals: on the hub shell's right side,
there are faint signs it's been pried open—though it's hard to see in the photo.
There are ways to pry it open without leaving obvious traces, though.
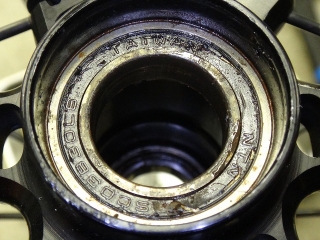
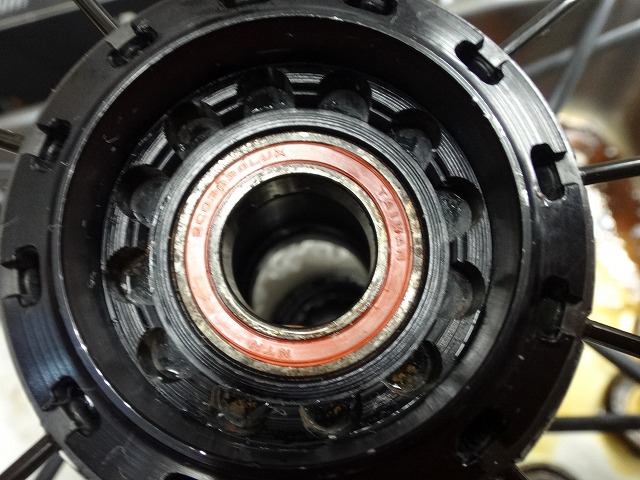
This is the bearing on the left side of the hub shell.
The seal shows clear pry marks and is dented in.
This bearing's rotation was gritty—definitely needed replacement.

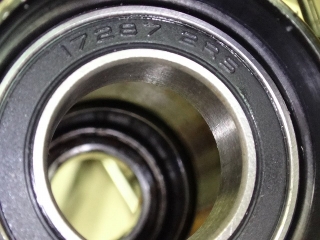
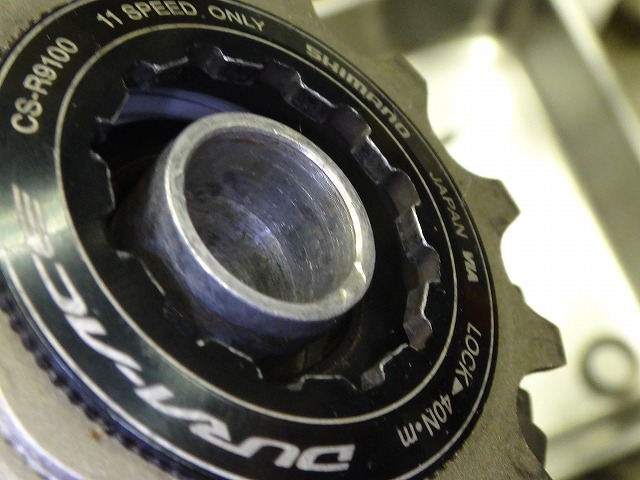
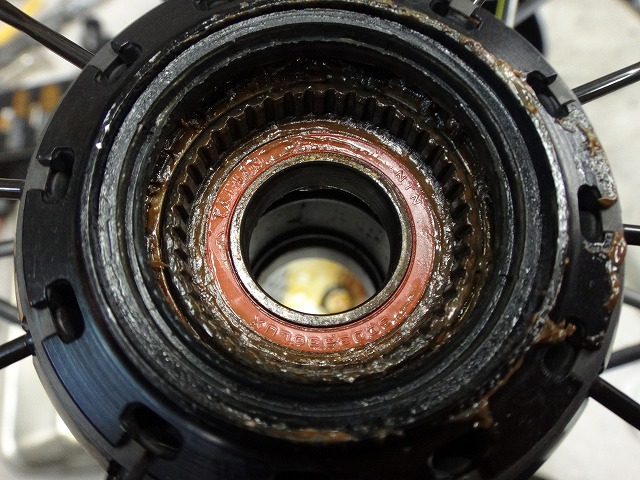
It reads "NTN TAIWAN SC03838LB," but measuring the dimensions—
inner diameter 17mm, outer diameter 28mm, width 7mm—
gives the same specs as a 172287 bearing.
The "LB" at the end of the original bearing's part number indicates
a non-contact seal (as opposed to "LU" for contact seals),
but since the right bearing has an orange contact-type seal,
I'm not sure if it's OEM.
Also, what I can source is a non-contact seal bearing.
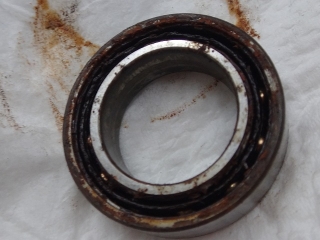
↑The removed bearing
When I sprayed penetrating oil, rust juice kept coming out.
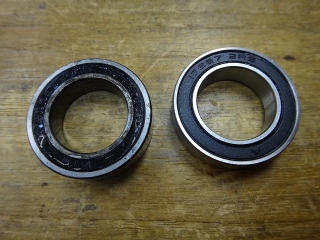
I ordered replacement bearings.
I keep 152287 in stock since I use it often,
but 172287 isn't used as much, so I ordered just one.

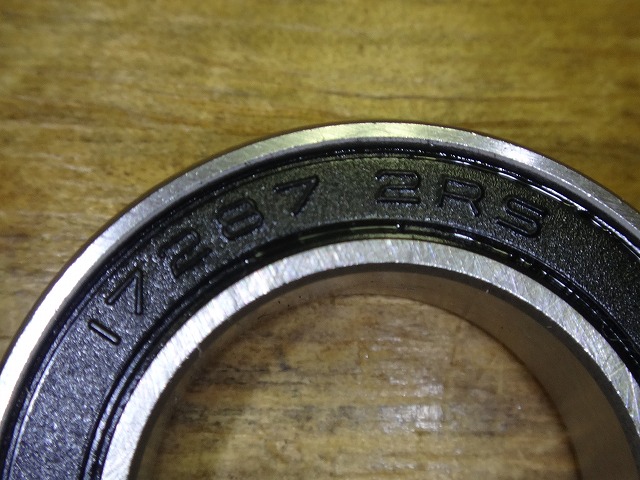
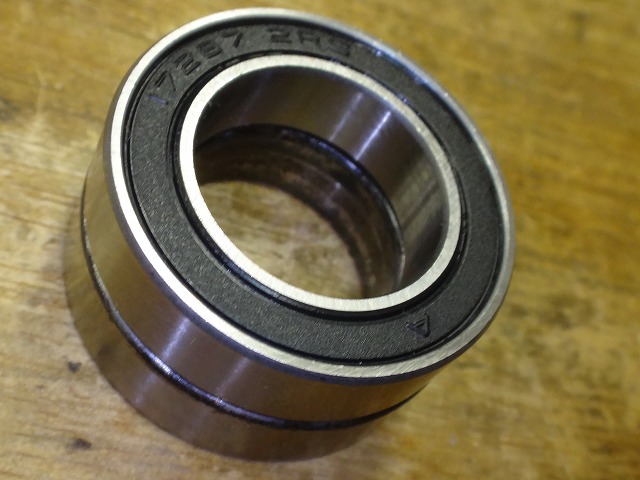
The seal marking reads 172287,

and the size matches.
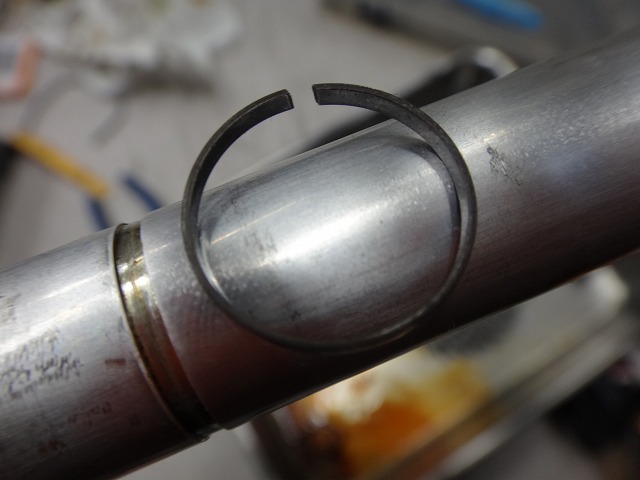
I installed the wave washer and snapring on the left side of the hub axle
the "correct" way.
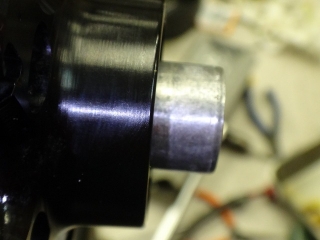
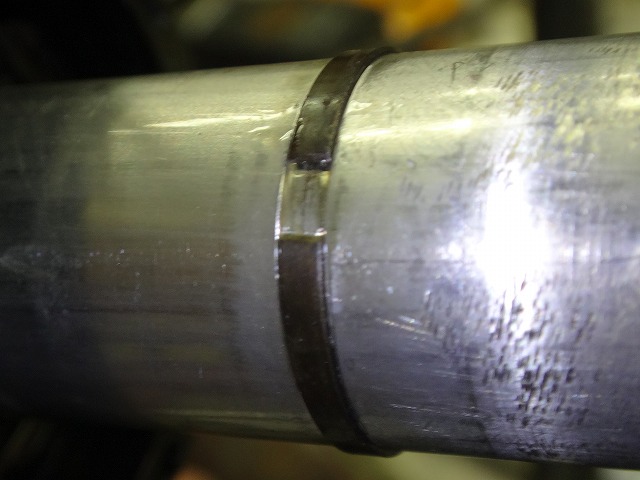
For the left press-fit end, the threaded section goes deep into
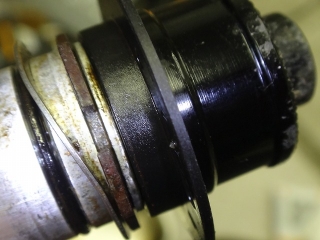
like this.

When the freebody sticks and won't come out,
it's probably caused by hammering the sprocket or low gear area
from the wheel's left side,
and the snapring can come loose and end up contacting the press-fit end.
In this state, the hub axle will have lateral play.
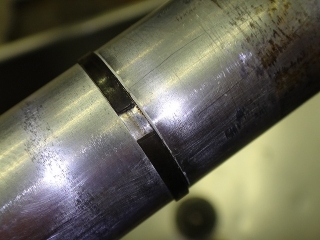
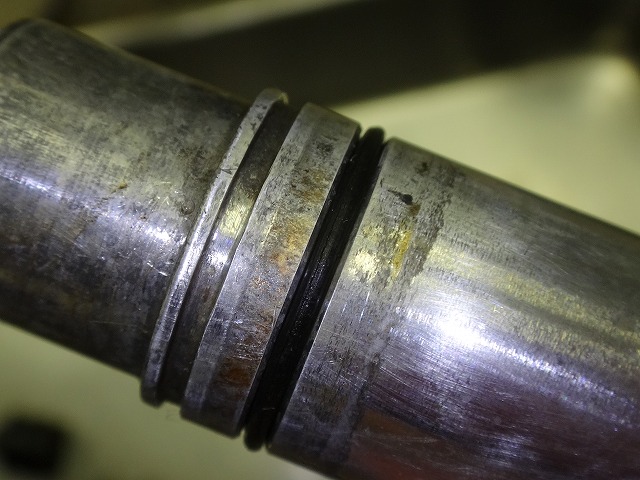
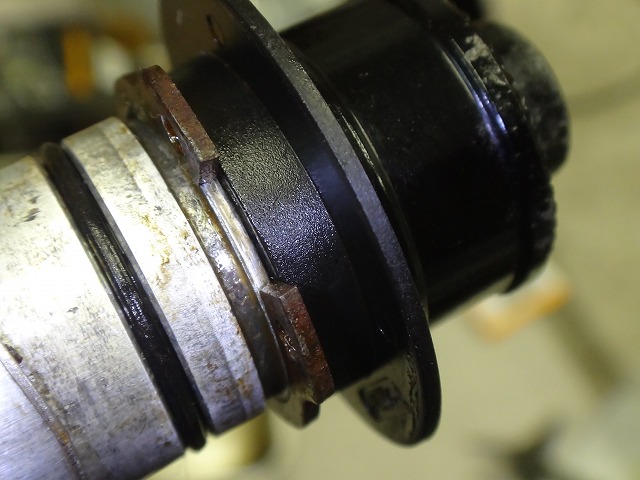
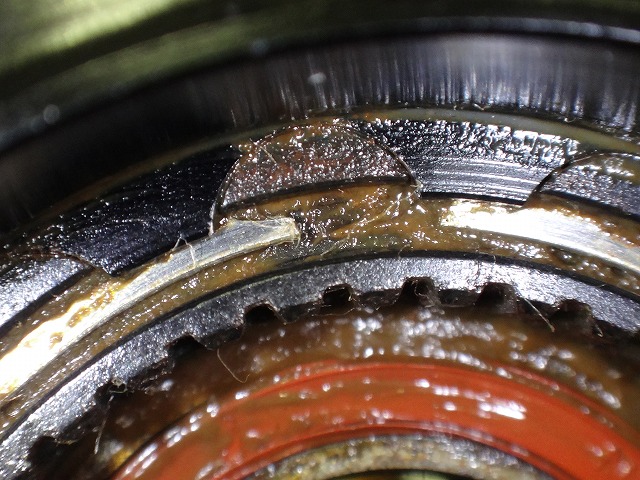
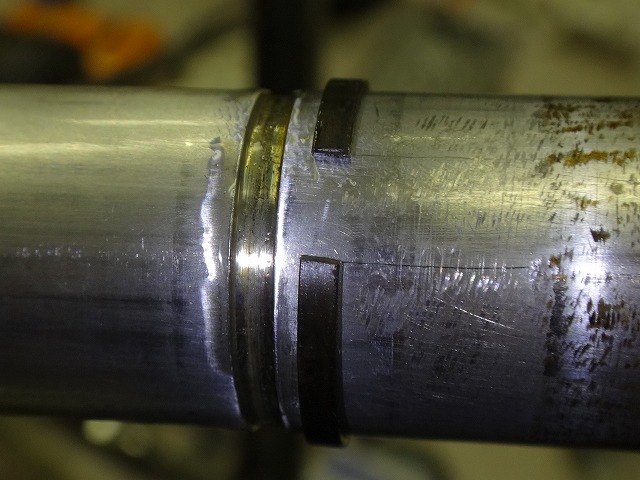
If you go back and look at the earlier photo
where I'd just removed the left press-fit end,
you can see the snapring isn't in the groove but rather
positioned as shown in the image above.

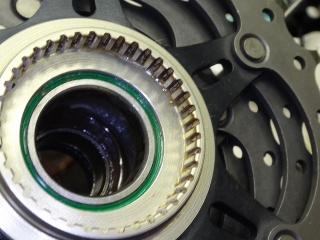
On the hub shell's right side, judging by the interior condition,
the water/dust seal isn't doing its job,
so I removed it.
I quickly wiped away the dirty grease.

Once the dirt was gone, I could see
the gap in the C-ring that secures the ratchet seat,
so I removed the C-ring,

and also removed the ratchet seat,
then cleaned the hub shell

as thoroughly as I could.
I pressed in the left bearing.
What I discovered later was that once this bearing was new,
the right bearing's relatively minor wear became more apparent.
However, I didn't replace the right bearing this time.
If I'd ordered two or more bearings,
I would have asked the customer and replaced both left and right.

As for the snapring,
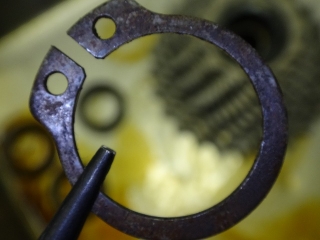
I've squeezed its shape to increase the clamping force when installed.
In other words, the original condition must have been more open than it should be.
Here, I first assembled the parts on the left side of the hub axle,
then threaded them through the hub shell,

and attempted to slide the C-ring that contacts the right bearing's inner race
to secure it,

but it wouldn't fit.

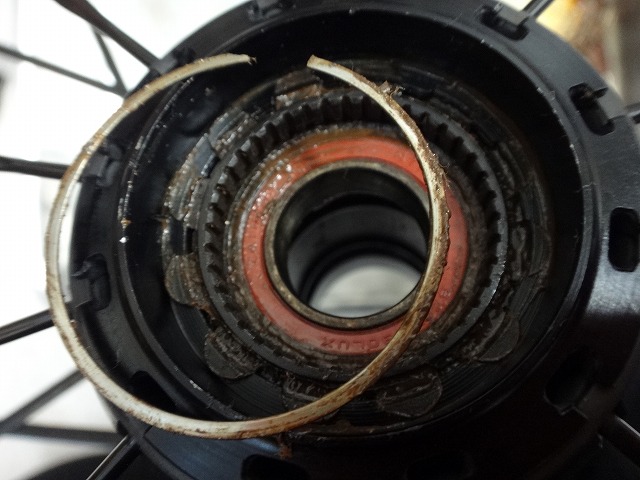
At this point, the hub axle can still move
within the range shown in the image above.


I installed the C-ring on the right side first,
then threaded the hub axle through from the right side of the hub shell,

and installed the snapring.
↑If the hub axle still has lateral play in this state,
the snapring isn't seated properly.
Of course, in the state shown above, there's no lateral play.

There were many foreign objects inside the rim, and the wheel made noise when shaken,
so I wanted to remove them without peeling back the rim tape.
However, the valve nut had been tightened with a tool, not just by hand,
and wouldn't budge with hand strength alone.
This means if the rider got a puncture that sealant couldn't prevent out on the road,
trying to switch to a tubed setup would be impossible without tools.
Unless they carry a massive set of pliers in their jersey pocket.
Once I loosened the nut with pliers, only the nut's threads were damaged—
a standard brass valve nut slid on smoothly,
so I swapped it out.
The tubeless performance remains unaffected.
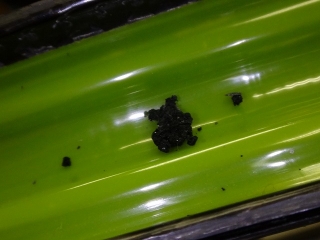
Though not to this degree,
there was plenty of debris buildup inside the rim.

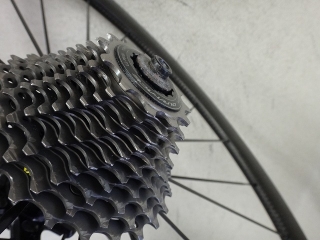
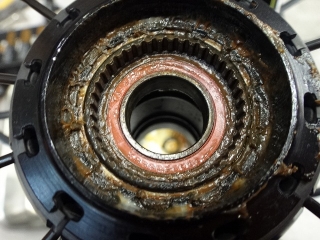
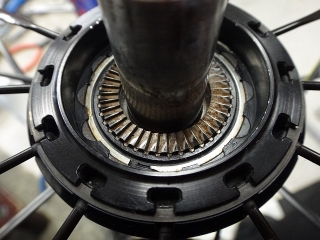
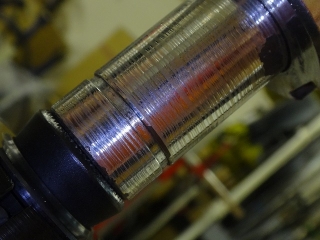
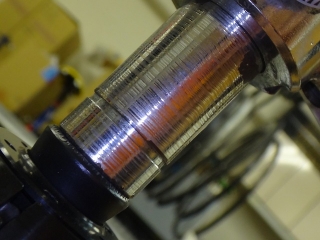
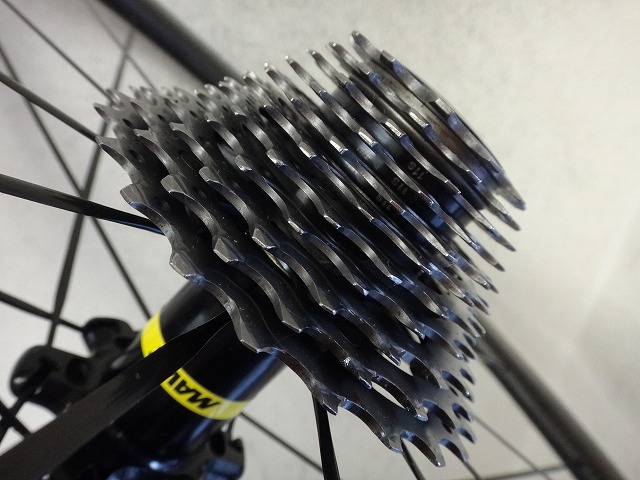
Looking at the Mavic ratchet surface peaks,

the outer perimeter shows particular wear.
I reassembled the components.
The water/dust seal shown in the image hasn't been installed yet—
I added it afterwards.
The freebody shows no flash rust or other damage.
That's because it was just recently replaced at the customer's local shop.
In a previous, separate job, when I fixed lateral play on an Instant Drive 360 hub
brought directly from Tokyo,
I found a wave washer positioned outside the left snapring—
Since the customer hadn't touched the wheel and had just taken it to a shop
for an overhaul,
it had to be an assembly mistake there.
I explained that it made no sense for the snapring to stay in groove while
a wave washer fell out when just the left press-fit end was removed.
I printed out Mavic's assembly diagram and showed the customer,
reassembled it according to the diagram, and the play disappeared (as it should).
The customer mentioned they might speak to that shop, and I said they could use my name.
However, the shop that did the freebody replacement this time
is under the same brand name as that shop.
Since they operate multiple locations, I can't say if it's the same actual shop.

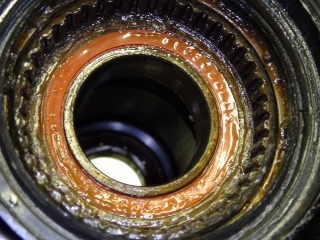
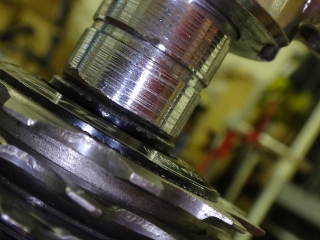
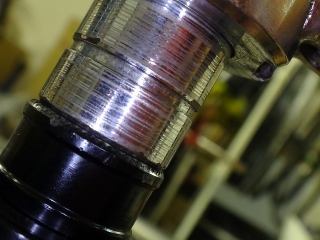
I do stock Mavic's proprietary grease (for some reason),
but I deliberately used DT's star ratchet grease instead.
After applying it quite generously, I installed and removed the freebody a couple of times
to work it in, which produced the above image.
Whether the seal is inadequate or it's the nature of the ratchet surface is unclear
(though DT's star ratchet doesn't need maintenance this frequently),
but as I mentioned earlier, the Instant Drive 360's window for maintaining
peak performance is extremely short.


Right now, the freebody comes off by hand.
I've applied high-viscosity oil to the hub axle,
but how long that lasts is anyone's guess.

On a tangent: DT's star ratchet grease,

used to come as 25ml in a cylindrical container,
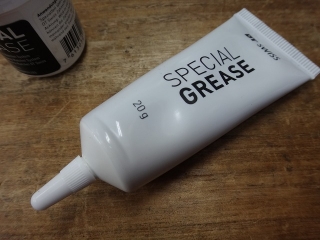
but at the same price, they switched to a 20g tube.
Since the units differ, I can't tell if the quantity increased or decreased.
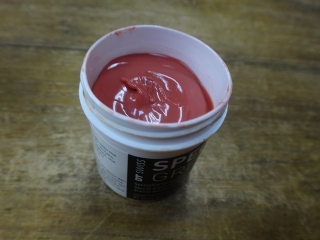
↑This is an unopened unit from the old packaging,

but . . . it's unclear.
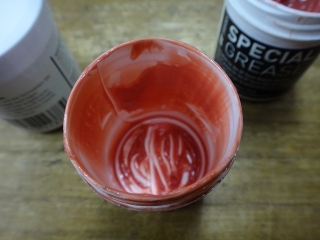
I have an old nearly-empty container, so if I dumped the entire tube's contents into it,
I could figure it out roughly, but the tube format does make application to the ratchet
peaks easier, so I couldn't bring myself to empty the tube.

The rear wheel had centering issues.
I fixed it.
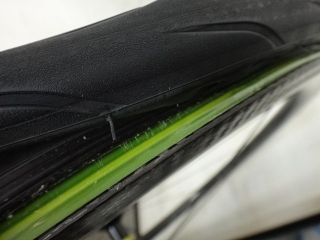
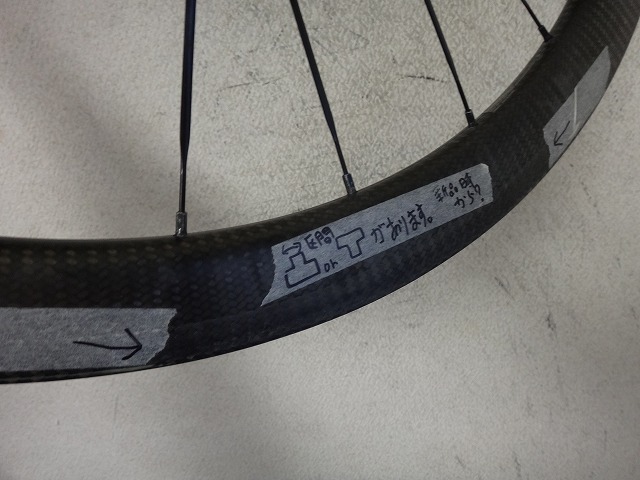
Apart from rim hook deformation, there was hardly any runout.
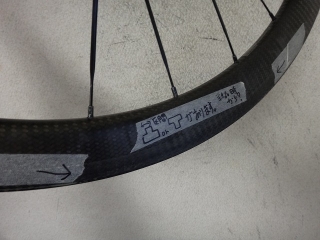
The rim hook on the non-freebody side shows deformation from impact—
hitting a pothole or gap while the rim was hot.
Whether the rider remembers doing it doesn't matter.
It's definitely been deformed after assembly.
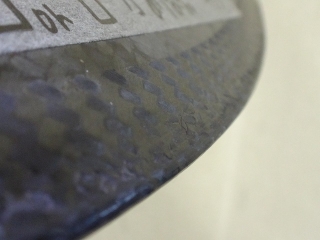
↑The image might not convey it clearly,
but the rim hook is bulging outward.
↑I'm completely certain that would never happen.
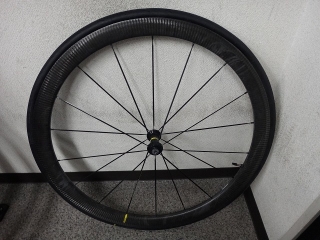
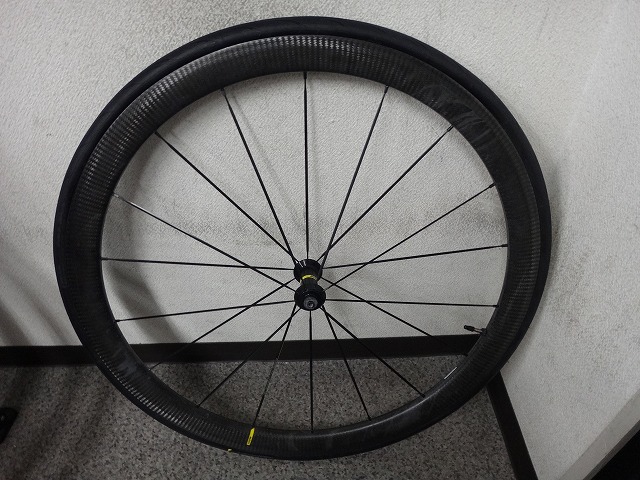
Now for the front wheel.
The customer reports no obvious issues,
but requested a check anyway.
The reason it still has the tire is that I couldn't break the seal
on the tubeless tire's rim grip,
which delayed shipping to our shop.
The customer tried again after growing their nails out,
but I dropped it in seconds.
It's not about nail length—it's about how you press the tire sidewall
with the fleshy part of your thumb.
You don't need zero force, but technique matters more than strength.

It had more runout than the rear wheel.
Plus there's centering issues.
For a front wheel without dish, this amount is pretty rough.
I fixed both the runout and the centering.
It was shipped from a distance, but beforehand
they consulted me about the symptoms:
the freebody wouldn't come out by hand, and
there was lateral play in the rear hub axle.
The Instant Drive 360 uses a press-fit end design
with no threaded bearing adjustment element to speak of,
so logically there shouldn't be any lateral play.
However, I actually know of cases where lateral play appears
when the snapring in the groove at the left end of the hub axle
comes loose for some reason.
Having known about this issue, I advised them: "Try checking the snapring"
but . . .
In the end, the wheel was shipped to our shop.


Both sides use press-fit ends.
The previous FTS-L freebody
has a rather unique structure where the bearing sits on the outside of the freebody
(meaning there's no bearing on the inside of the freebody itself),
with an inner diameter of 9mm.
To accommodate a 12mm through-axle,
the hub axle obviously needs an inner diameter of 12mm,
while the outer diameter needs to be 15mm or 17mm.
This also becomes the bearing inner diameter for the hub shell and freebody.
This hub can also be converted from quick-release to through-axle
by swapping the press-fit ends,
but since this is a rim brake wheel,
converting it to through-axle would probably never happen.
Beyond ease of through-axle conversion,
another characteristic of the Instant Drive 360
is its ratchet surface design, similar to DT's star ratchet.
However, the window for maintaining initial performance is extremely short,
and considering the price and availability of the proprietary paste grease,
plus the maintenance frequency needed to keep it in ideal condition,
proper operation of the system itself isn't realistic.
In fact, most wheels brought in here have ratchet grease that's completely dried out.
So if you ask me, it's a flawed design spec.

I removed the left press-fit end.
That's all I did—nothing else.
I took shots from different angles too, afraid of missing anything in the photos.
The customer's letter said "The snapring area seems to be assembled correctly,"
but sure enough, that's where the problem was—it wasn't assembled correctly.
It stings a bit when I've identified both the problem and the solution
but the message doesn't get through.
This isn't the first time, won't be the last,
and honestly, it happens pretty often.
Confident the snapring wasn't seated properly,
I gave it a gentle tap with a plastic hammer,
and the freebody-equipped hub axle popped right out the right side.
↑Like this
A wave washer is sandwiched between the snapring and bearing,
and the tension from this washer definitely makes it difficult
to seat the snapring into the groove.
↑The removed assembly

There are two grooves on the left side of the hub axle:
the inner one holds an O-ring directly beneath the bearing,
and the outer one is the groove for the snapring in question.
Because the freebody wouldn't come out by hand,

I happened to have a DT puller tool that fit perfectly,
so I attached it,

and pulled it out.
There's some flash rust on the section directly below the bearing,
but since the customer had the freebody replaced recently at a nearby shop,
the bearing itself shows minimal wear.
Still, when the hub axle is this rusty and dirty,
it can get nearly stuck even with undamaged bearings.

I wiped away the dirty grease.
Before

After

The C-ring on the right side of the hub axle that holds the right bearing of the hub shell,
and the rubber O-ring on the left side of the hub axle—
I temporarily removed both and polished them as much as possible.
The hub's interior was so heavily rusted
that I asked the customer later if they'd been using a pressure washer,
but they said they hadn't. Hmm.

The interior of the hub shell is heavily rusted too.
Despite appearances, I thought the right bearing of the hub shell
showed minimal enough wear to not need replacement.
At that point in time, anyway.

Looking at the bearing seals: on the hub shell's right side,
there are faint signs it's been pried open—though it's hard to see in the photo.
There are ways to pry it open without leaving obvious traces, though.
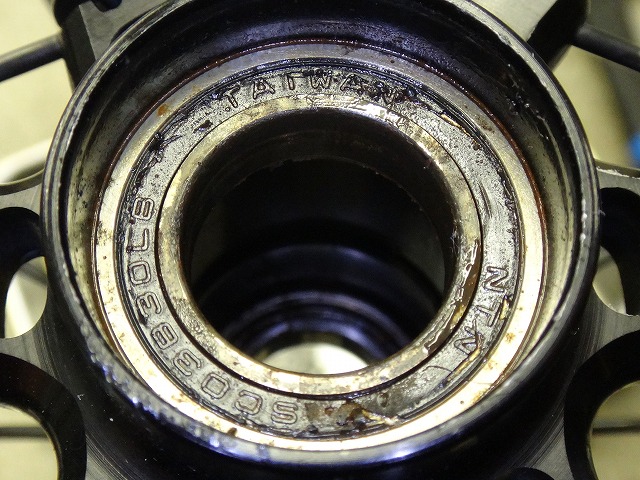
This is the bearing on the left side of the hub shell.
The seal shows clear pry marks and is dented in.
This bearing's rotation was gritty—definitely needed replacement.
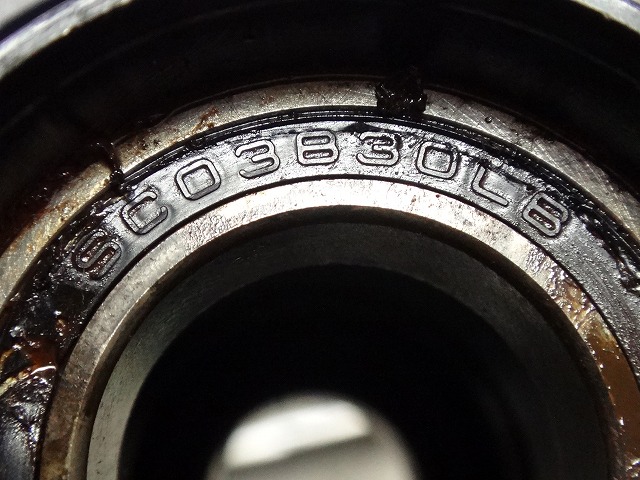
It reads "NTN TAIWAN SC03838LB," but measuring the dimensions—
inner diameter 17mm, outer diameter 28mm, width 7mm—
gives the same specs as a 172287 bearing.
The "LB" at the end of the original bearing's part number indicates
a non-contact seal (as opposed to "LU" for contact seals),
but since the right bearing has an orange contact-type seal,
I'm not sure if it's OEM.
Also, what I can source is a non-contact seal bearing.

↑The removed bearing
When I sprayed penetrating oil, rust juice kept coming out.

I ordered replacement bearings.
I keep 152287 in stock since I use it often,
but 172287 isn't used as much, so I ordered just one.
The seal marking reads 172287,
and the size matches.

I installed the wave washer and snapring on the left side of the hub axle
the "correct" way.

For the left press-fit end, the threaded section goes deep into

like this.
When the freebody sticks and won't come out,
it's probably caused by hammering the sprocket or low gear area
from the wheel's left side,
and the snapring can come loose and end up contacting the press-fit end.
In this state, the hub axle will have lateral play.
If you go back and look at the earlier photo
where I'd just removed the left press-fit end,
you can see the snapring isn't in the groove but rather
positioned as shown in the image above.
On the hub shell's right side, judging by the interior condition,
the water/dust seal isn't doing its job,

so I removed it.

I quickly wiped away the dirty grease.
Once the dirt was gone, I could see
the gap in the C-ring that secures the ratchet seat,
so I removed the C-ring,

and also removed the ratchet seat,
then cleaned the hub shell
as thoroughly as I could.

I pressed in the left bearing.
What I discovered later was that once this bearing was new,
the right bearing's relatively minor wear became more apparent.
However, I didn't replace the right bearing this time.
If I'd ordered two or more bearings,
I would have asked the customer and replaced both left and right.
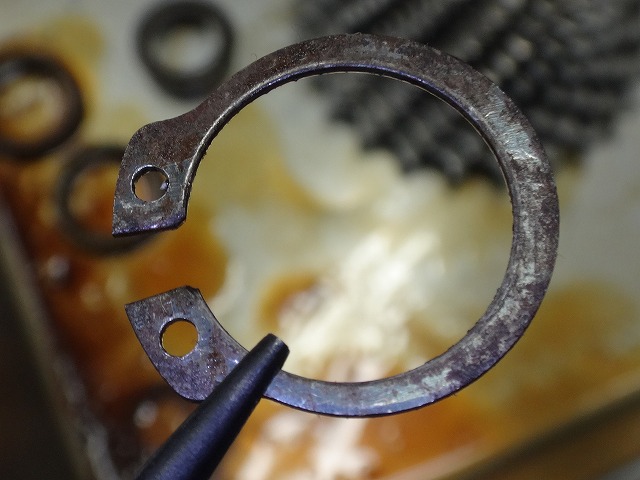
As for the snapring,

I've squeezed its shape to increase the clamping force when installed.
In other words, the original condition must have been more open than it should be.

Here, I first assembled the parts on the left side of the hub axle,
then threaded them through the hub shell,
and attempted to slide the C-ring that contacts the right bearing's inner race
to secure it,

but it wouldn't fit.


At this point, the hub axle can still move
within the range shown in the image above.
I installed the C-ring on the right side first,
then threaded the hub axle through from the right side of the hub shell,
and installed the snapring.


↑If the hub axle still has lateral play in this state,
the snapring isn't seated properly.
Of course, in the state shown above, there's no lateral play.

There were many foreign objects inside the rim, and the wheel made noise when shaken,
so I wanted to remove them without peeling back the rim tape.
However, the valve nut had been tightened with a tool, not just by hand,
and wouldn't budge with hand strength alone.
This means if the rider got a puncture that sealant couldn't prevent out on the road,
trying to switch to a tubed setup would be impossible without tools.
Unless they carry a massive set of pliers in their jersey pocket.
Once I loosened the nut with pliers, only the nut's threads were damaged—
a standard brass valve nut slid on smoothly,
so I swapped it out.
The tubeless performance remains unaffected.

Though not to this degree,
there was plenty of debris buildup inside the rim.
Looking at the Mavic ratchet surface peaks,
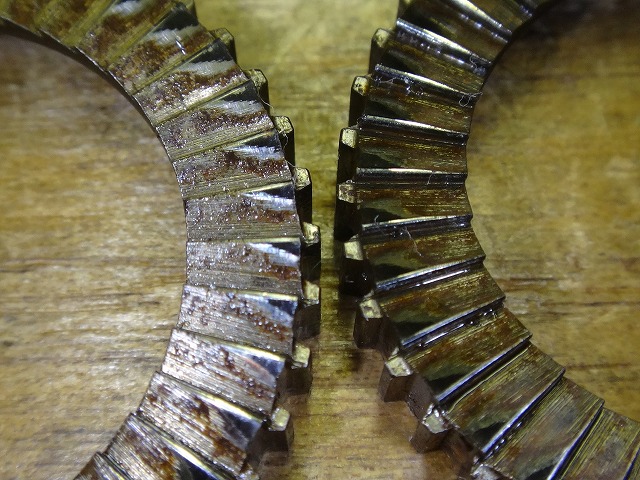
the outer perimeter shows particular wear.

I reassembled the components.
The water/dust seal shown in the image hasn't been installed yet—
I added it afterwards.

The freebody shows no flash rust or other damage.
That's because it was just recently replaced at the customer's local shop.
In a previous, separate job, when I fixed lateral play on an Instant Drive 360 hub
brought directly from Tokyo,
I found a wave washer positioned outside the left snapring—
Since the customer hadn't touched the wheel and had just taken it to a shop
for an overhaul,
it had to be an assembly mistake there.
I explained that it made no sense for the snapring to stay in groove while
a wave washer fell out when just the left press-fit end was removed.
I printed out Mavic's assembly diagram and showed the customer,
reassembled it according to the diagram, and the play disappeared (as it should).
The customer mentioned they might speak to that shop, and I said they could use my name.
However, the shop that did the freebody replacement this time
is under the same brand name as that shop.
Since they operate multiple locations, I can't say if it's the same actual shop.
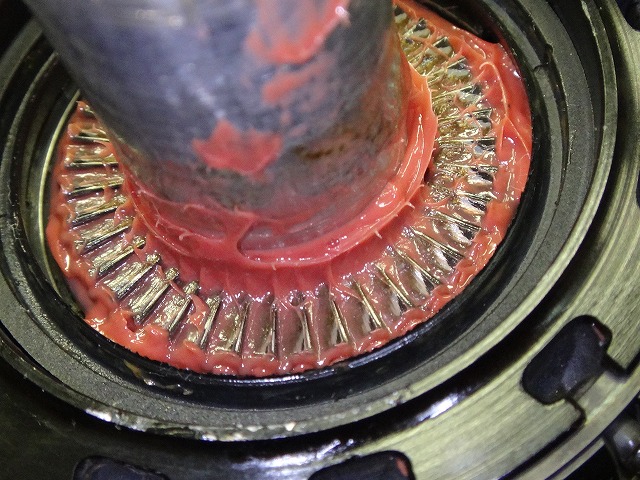
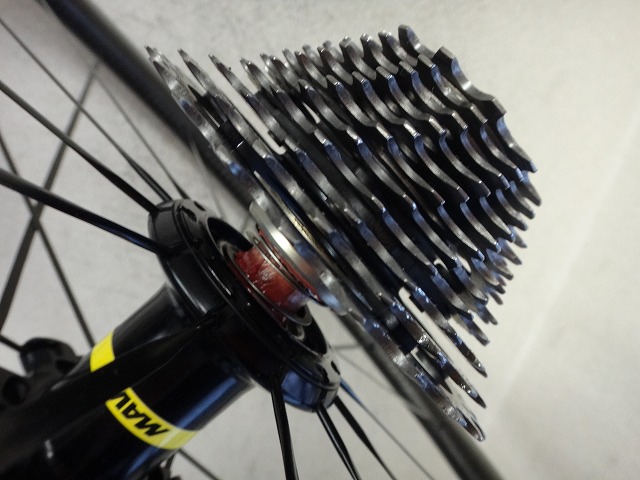
I do stock Mavic's proprietary grease (for some reason),
but I deliberately used DT's star ratchet grease instead.
After applying it quite generously, I installed and removed the freebody a couple of times
to work it in, which produced the above image.
Whether the seal is inadequate or it's the nature of the ratchet surface is unclear
(though DT's star ratchet doesn't need maintenance this frequently),
but as I mentioned earlier, the Instant Drive 360's window for maintaining
peak performance is extremely short.
Right now, the freebody comes off by hand.
I've applied high-viscosity oil to the hub axle,
but how long that lasts is anyone's guess.
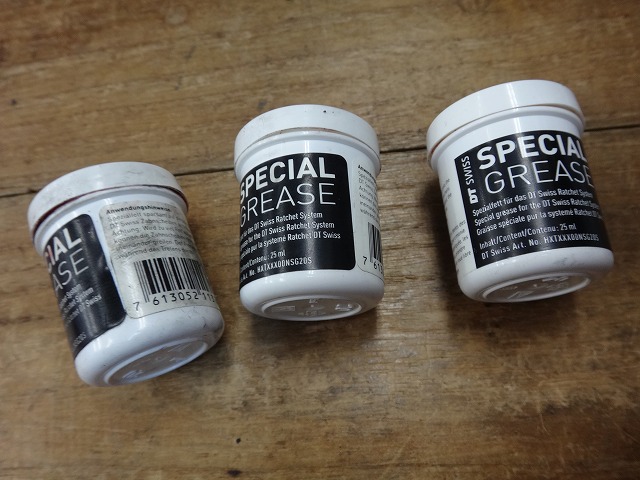
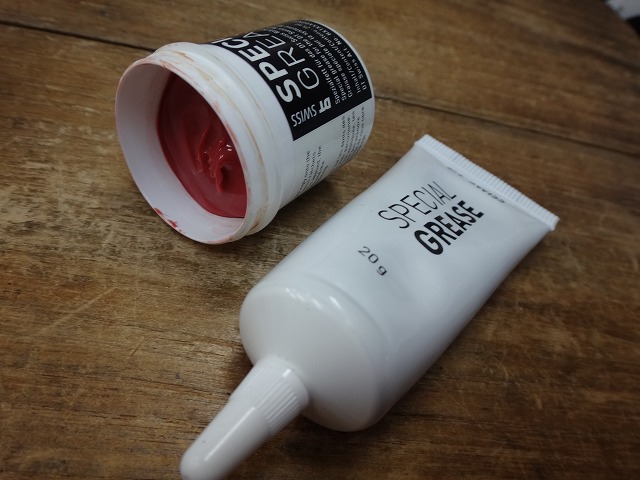
On a tangent: DT's star ratchet grease,

used to come as 25ml in a cylindrical container,

but at the same price, they switched to a 20g tube.
Since the units differ, I can't tell if the quantity increased or decreased.

↑This is an unopened unit from the old packaging,
but . . . it's unclear.

I have an old nearly-empty container, so if I dumped the entire tube's contents into it,
I could figure it out roughly, but the tube format does make application to the ratchet
peaks easier, so I couldn't bring myself to empty the tube.

The rear wheel had centering issues.


I fixed it.
Apart from rim hook deformation, there was hardly any runout.
The rim hook on the non-freebody side shows deformation from impact—
hitting a pothole or gap while the rim was hot.
Whether the rider remembers doing it doesn't matter.
It's definitely been deformed after assembly.

↑The image might not convey it clearly,
but the rim hook is bulging outward.

↑I'm completely certain that would never happen.
Now for the front wheel.
The customer reports no obvious issues,
but requested a check anyway.
The reason it still has the tire is that I couldn't break the seal
on the tubeless tire's rim grip,
which delayed shipping to our shop.
The customer tried again after growing their nails out,

but I dropped it in seconds.
It's not about nail length—it's about how you press the tire sidewall
with the fleshy part of your thumb.
You don't need zero force, but technique matters more than strength.

It had more runout than the rear wheel.
Plus there's centering issues.
For a front wheel without dish, this amount is pretty rough.


I fixed both the runout and the centering.