Wheels again today (and so on).
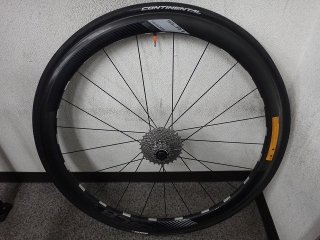
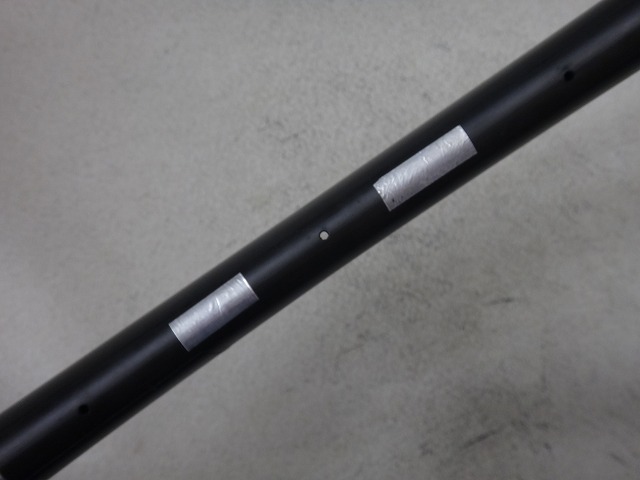
I'm rebuilding the rear wheel of a GIANT SLR1, which also has the spoke DBL (double-butted lacing) I wrote about the other day (here).
In the linked article, I wrote this was a weight,
but according to the customer, it's the so-called "aluminum tape that Toyota uses too" for static electricity or whatever.

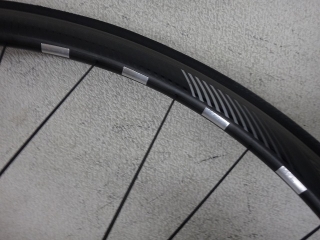
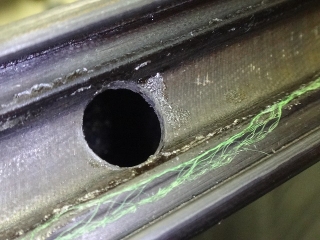
A Hutchinson stretch-band type rim tape had been applied.
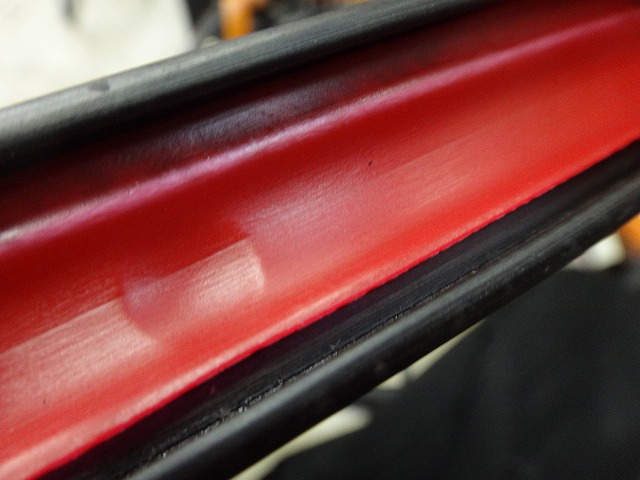
When first applied to the rim,
it probably fit roughly with the rim's interior width,
but with stretch-band type rim tape on a tubeless rim that has a depression for dropping the tire bead initially,
the tape gets dragged into the depression and shifts to one side,
creating areas where the tape isn't doing its job.
When there's a hump, the tape's seam often ends up at the hump.
That's what's happened here too.
This rim isn't an offset rim, but with DT or Bontrager offset rims
where the outer holes are also offset from center, or
with non-offset rims where
the outer holes have runout,
rim holes can be exposed from the tape edge
and cause punctures.
↑Where it switches from right-biased to left-biased
I've written this repeatedly, but tubeless-compatible rims need
tape-type rim tape even if you're not using tubeless tires.
With this wheel having internal nipples,
we'd have to peel off unreusable tape
each time we do trueing in the future, but there's no help for it.
When I removed the Hutchinson rim tape,
residue from the nylon adhesive tape applied before
remained along with the adhesive tape itself, so

I cleaned it up reasonably well.
What I'll be applying later is Stan's tape, and
Stan's tape also has the advantage of
hardly leaving any annoying adhesive residue.
Since I'm saying "also has," I should mention other advantages too—
the fact that I can cleanly puncture holes with soldering iron heat
is personally a big one.

↑Rim holes biased "right, left, right" from bottom left to top right of the image.
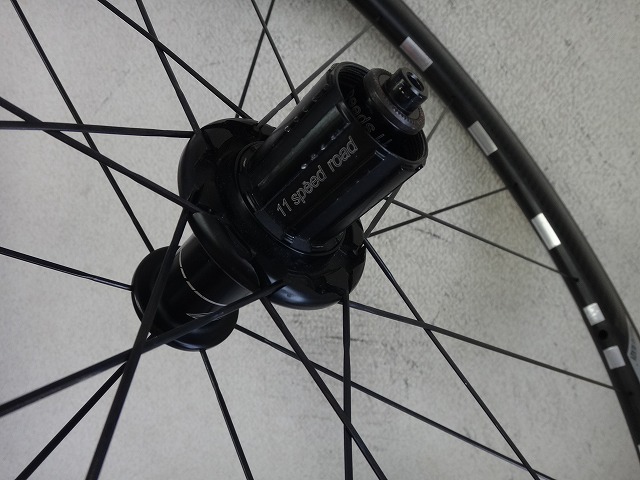
This is a 2:1 spoke pattern rim, but
most rims have the freewheel side holes centered,
whereas this rim offset the freewheel side to the right as well.
This rim is 14+7 = 21H, but even if it were 16+8 = 24H,
you couldn't build it with a generic 12H-left, 12H-right hub.
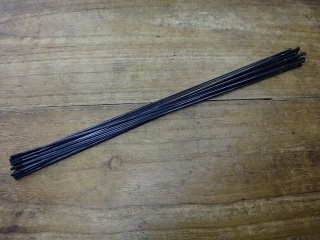
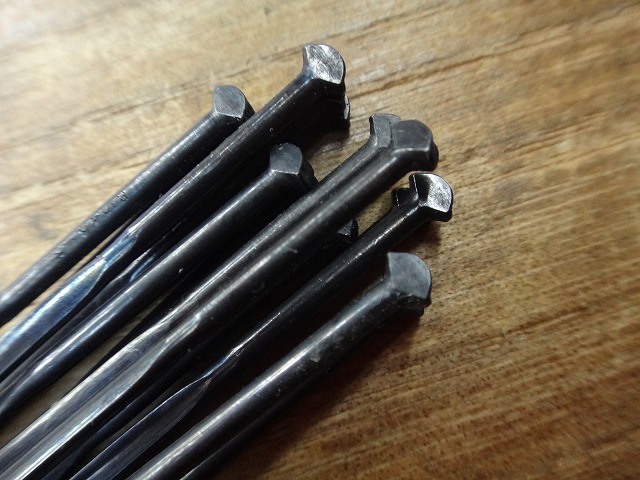
I've completely disassembled the wheel,
and here are the 14 spokes from the former freewheel side.
When I roughly align the threaded ends,

there's this much difference in length at the spoke head.
The porcupine direction spokes have higher spoke specific gravity at 274mm,
and the anti-porcupine direction spokes have lower spoke specific gravity at 268mm.
That's quite a difference in length. Unnecessary variation...
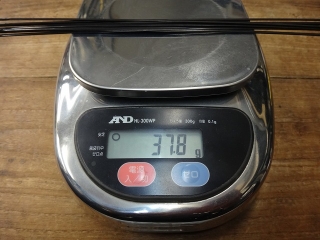
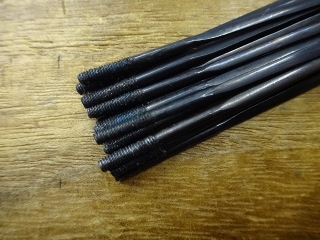
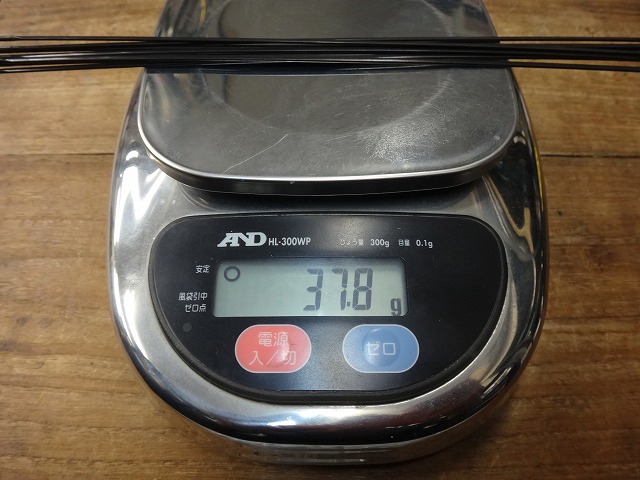
↑Porcupine direction spokes, 274mm, 7 pieces.
Spoke specific gravity is 37.8÷7÷274÷0.0257 equals
0.76684..., so
about 76.7% or 76.8%.

Anti-porcupine direction spokes, 268mm, 7 pieces.
Spoke specific gravity is 30.7÷7÷268÷0.0257 equals
0.63675..., so
about 63.6% or 63.7%.
These spokes are Aerolight and Aerocomp, and
in terms of spoke specific gravity, they're equivalent to CX-RAY and CX Sprint.
I always say CX-RAY spokes have a specific gravity of 64.5% and
65% is okay for rough calculations, and
CX Sprint is about 78%, but
these spokes came out lower because they're straight-gauge spokes.
Compared to bend-elbow spokes and straight spokes,
the volume of the part excluded from spoke length (length below the elbow) range
is larger for the former.
So spoke specific gravity for straight spokes tends to
come out about 1% lower.
For this job, I'm converting the 274mm side to CX-RAY and
while I can't do anything about spoke length,
I'm doing equal-diameter lacing that denies DBL regarding spoke specific gravity. But
for the straight-gauge CX-RAY,
rather than cutting the 300mm one, which has a long 14-gauge plain section,
I checked the length in advance and sourced 274mm from the start.
That said, the 300mm ones can be cut to 270mm, so
if I actually machined 300→274mm, the plain section
on the threaded end would be basically the same as one that was 274mm from the start.
So the weight of those 7 straight 274mm CX-RAY spokes
was 31.4g. Calculating spoke specific gravity,
it's 0.63701..., about 63.7%.
This is almost the same as the 268mm Aerolight side, and
if the CX-RAY straight were 268mm,
it would be 30.712...g, so again almost the same weight.
For this spoke's DBL,
unless specially ordered, available spokes are
limited to 6 types: 100% round or aero, 85% round,
78% aero, and 65% round or aero, so
I've been doing it with 78% and 65% aero,
but if I rigorously calculated
the appropriate spoke specific gravity difference (probably around 3-5%) for a 6mm spoke length difference
and had spokes made specially,
I don't think it'd be impossible to make
"single-flange different-diameter lacing that's better than ordinary wheels."
Well, in practice it's impossible.

It's built.
I converted the porcupine direction spokes to black CX-RAY straight
and negated the spoke specific gravity DBL.
I can't change the spoke length DBL from hub design.
The freewheel side's spoke specific gravity DBL is
quietly abandoned on this version of the SLR1 rear wheel—it's equal-diameter laced, but
this rear wheel is anti-freewheel with Aerocomp so
it's reverse different-diameter lacing relative to the 2:1 lacing.
As for cross-lacing... I don't think it's necessary, so I won't do it.
The freewheel side's final cross crimp is nearly immobile.
If the customer requests it later,
I can do cross-lacing alone another time.

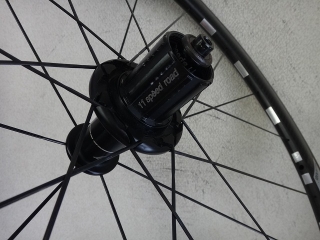
Going back in the timeline, the DT freewheel body's freewheel sound was
unusually loud for a star ratchet, so
I extracted the freewheel body to check, and
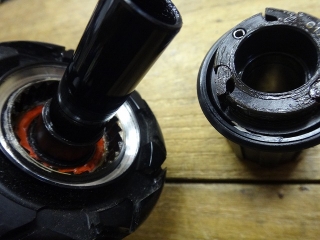
it was a pawl-spring type freewheel body used on budget models.
In terms of maintenance frequency, this type is superior though.
The grease around the pawls was completely dried out, so
I added some appropriately. I didn't make it completely silent.
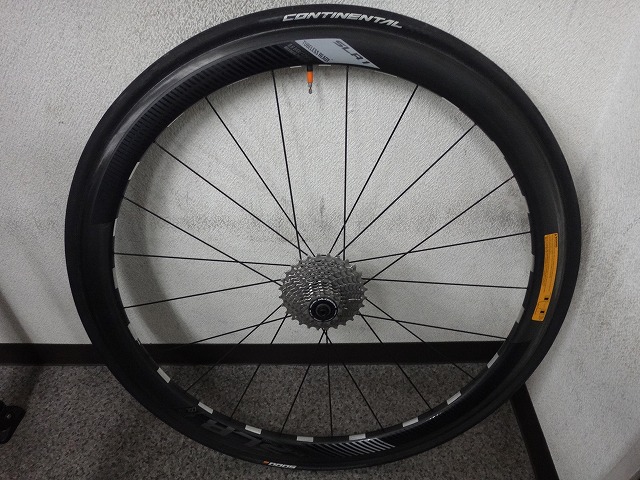
I'm rebuilding the rear wheel of a GIANT SLR1, which also has the spoke DBL (double-butted lacing) I wrote about the other day (here).
In the linked article, I wrote this was a weight,
but according to the customer, it's the so-called "aluminum tape that Toyota uses too" for static electricity or whatever.
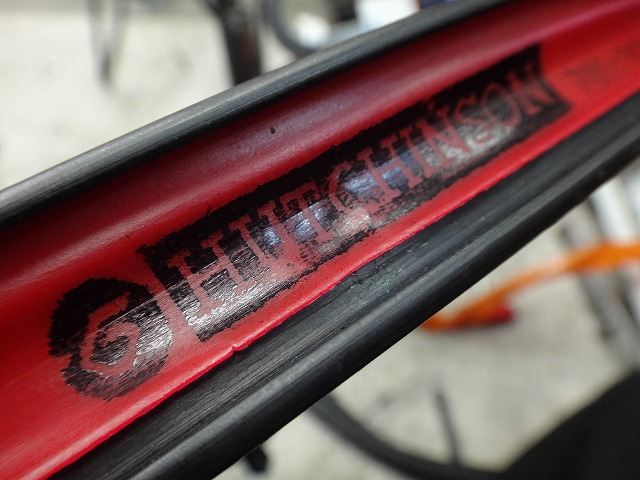
A Hutchinson stretch-band type rim tape had been applied.
When first applied to the rim,
it probably fit roughly with the rim's interior width,
but with stretch-band type rim tape on a tubeless rim that has a depression for dropping the tire bead initially,
the tape gets dragged into the depression and shifts to one side,
creating areas where the tape isn't doing its job.
When there's a hump, the tape's seam often ends up at the hump.
That's what's happened here too.
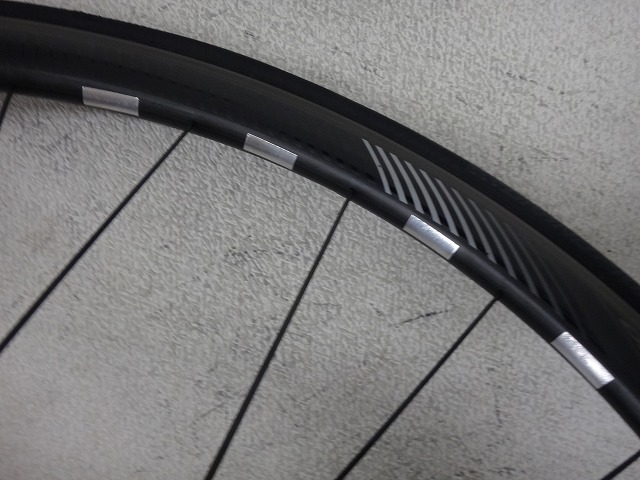
This rim isn't an offset rim, but with DT or Bontrager offset rims
where the outer holes are also offset from center, or
with non-offset rims where
the outer holes have runout,
rim holes can be exposed from the tape edge
and cause punctures.

↑Where it switches from right-biased to left-biased
I've written this repeatedly, but tubeless-compatible rims need
tape-type rim tape even if you're not using tubeless tires.
With this wheel having internal nipples,
we'd have to peel off unreusable tape
each time we do trueing in the future, but there's no help for it.

When I removed the Hutchinson rim tape,
residue from the nylon adhesive tape applied before
remained along with the adhesive tape itself, so
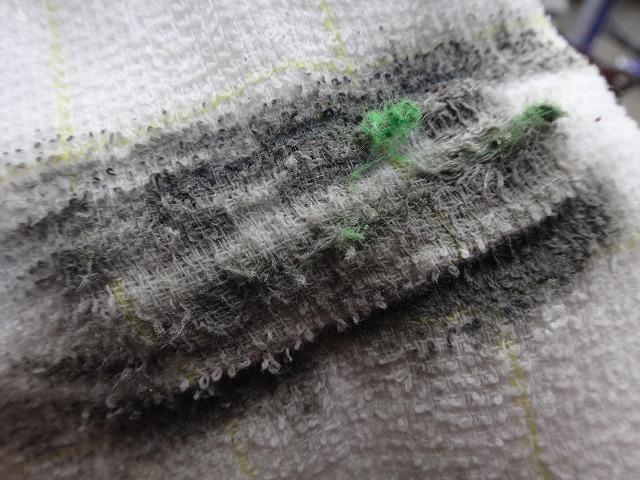
I cleaned it up reasonably well.
What I'll be applying later is Stan's tape, and
Stan's tape also has the advantage of
hardly leaving any annoying adhesive residue.
Since I'm saying "also has," I should mention other advantages too—
the fact that I can cleanly puncture holes with soldering iron heat
is personally a big one.
↑Rim holes biased "right, left, right" from bottom left to top right of the image.
This is a 2:1 spoke pattern rim, but
most rims have the freewheel side holes centered,
whereas this rim offset the freewheel side to the right as well.
This rim is 14+7 = 21H, but even if it were 16+8 = 24H,
you couldn't build it with a generic 12H-left, 12H-right hub.

I've completely disassembled the wheel,
and here are the 14 spokes from the former freewheel side.

When I roughly align the threaded ends,
there's this much difference in length at the spoke head.
The porcupine direction spokes have higher spoke specific gravity at 274mm,
and the anti-porcupine direction spokes have lower spoke specific gravity at 268mm.
That's quite a difference in length. Unnecessary variation...
↑Porcupine direction spokes, 274mm, 7 pieces.
Spoke specific gravity is 37.8÷7÷274÷0.0257 equals
0.76684..., so
about 76.7% or 76.8%.

Anti-porcupine direction spokes, 268mm, 7 pieces.
Spoke specific gravity is 30.7÷7÷268÷0.0257 equals
0.63675..., so
about 63.6% or 63.7%.
These spokes are Aerolight and Aerocomp, and
in terms of spoke specific gravity, they're equivalent to CX-RAY and CX Sprint.
I always say CX-RAY spokes have a specific gravity of 64.5% and
65% is okay for rough calculations, and
CX Sprint is about 78%, but
these spokes came out lower because they're straight-gauge spokes.

Compared to bend-elbow spokes and straight spokes,
the volume of the part excluded from spoke length (length below the elbow) range
is larger for the former.
So spoke specific gravity for straight spokes tends to
come out about 1% lower.
For this job, I'm converting the 274mm side to CX-RAY and
while I can't do anything about spoke length,
I'm doing equal-diameter lacing that denies DBL regarding spoke specific gravity. But
for the straight-gauge CX-RAY,
rather than cutting the 300mm one, which has a long 14-gauge plain section,
I checked the length in advance and sourced 274mm from the start.
That said, the 300mm ones can be cut to 270mm, so
if I actually machined 300→274mm, the plain section
on the threaded end would be basically the same as one that was 274mm from the start.
So the weight of those 7 straight 274mm CX-RAY spokes
was 31.4g. Calculating spoke specific gravity,
it's 0.63701..., about 63.7%.
This is almost the same as the 268mm Aerolight side, and
if the CX-RAY straight were 268mm,
it would be 30.712...g, so again almost the same weight.
For this spoke's DBL,
unless specially ordered, available spokes are
limited to 6 types: 100% round or aero, 85% round,
78% aero, and 65% round or aero, so
I've been doing it with 78% and 65% aero,
but if I rigorously calculated
the appropriate spoke specific gravity difference (probably around 3-5%) for a 6mm spoke length difference
and had spokes made specially,
I don't think it'd be impossible to make
"single-flange different-diameter lacing that's better than ordinary wheels."
Well, in practice it's impossible.

It's built.
I converted the porcupine direction spokes to black CX-RAY straight
and negated the spoke specific gravity DBL.
I can't change the spoke length DBL from hub design.
The freewheel side's spoke specific gravity DBL is
quietly abandoned on this version of the SLR1 rear wheel—it's equal-diameter laced, but
this rear wheel is anti-freewheel with Aerocomp so
it's reverse different-diameter lacing relative to the 2:1 lacing.
As for cross-lacing... I don't think it's necessary, so I won't do it.
The freewheel side's final cross crimp is nearly immobile.
If the customer requests it later,
I can do cross-lacing alone another time.

Going back in the timeline, the DT freewheel body's freewheel sound was
unusually loud for a star ratchet, so
I extracted the freewheel body to check, and

it was a pawl-spring type freewheel body used on budget models.
In terms of maintenance frequency, this type is superior though.
The grease around the pawls was completely dried out, so
I added some appropriately. I didn't make it completely silent.